The easiest way to flip images in PowerPoint – That’s how it works!
PowerPoint gives you many ways to flip (mirror and/or rotate) images, objects and text. You can use flipping for pragmatic, layout-related reasons, or as a “disruptive factor” to attract attention. This article talks you through how to flip in PowerPoint.
Flip images in PowerPoint
A PowerPoint presentation gets its oomph from the way it looks, the way you organize the different elements of your slide layout, including text and images. If you want to give them even more impact, there is a multitude of functions available to you in Microsoft Office PowerPoint. Images and texts should complement each other to bring the viewer closer to a topic. Images offer a greater visual variety than just deserts of text. Images can underline the message of the text and clarify the content, but should never distract too much from the text.
To make a PowerPoint slide look great, you may need to flip images or text at certain points. You can flip images and shapes both vertically and horizontally. With texts, you can also flip in all directions with a few small tricks.
After the flipping is done, you can add the finishing touches to the flipped image by selecting a style effect. This lets you create more original and interesting presentations for your audience.
In this article we will explain how you can use PowerPoint to…
- flip images and shapes
- change an image’s orientation
- change the direction of icons such as arrows
- flip texts vertically or upside down
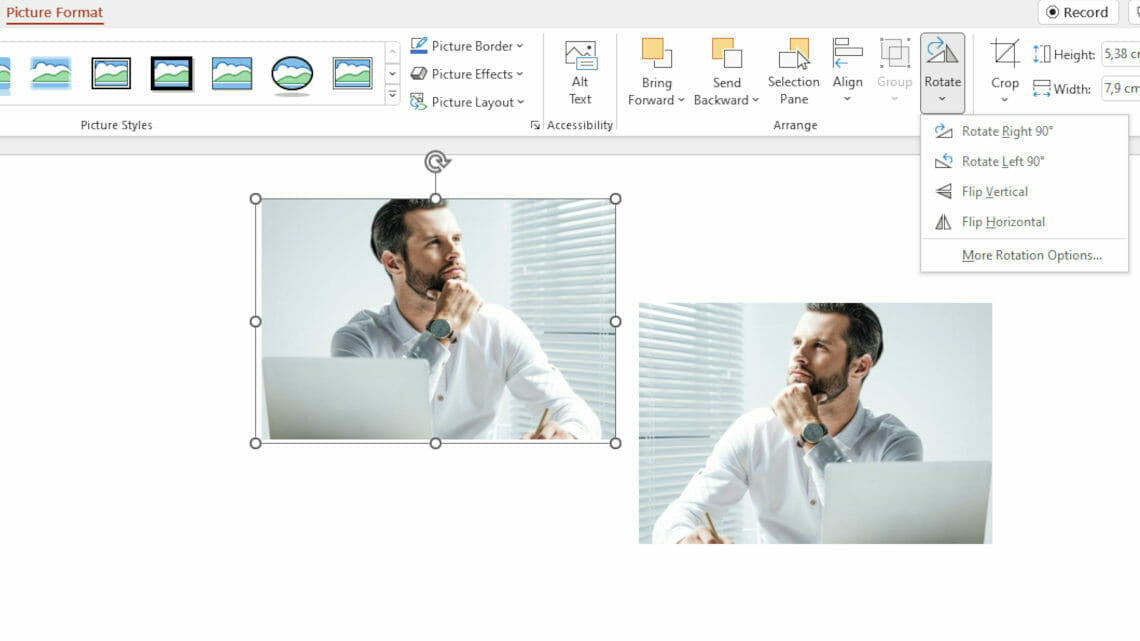
Horizontal flips, as the name suggests, take place on the horizontal axis (y-axis). This allows photos of people looking the wrong way for your presentation to be changed to suit, for example. Icons, such as arrows, can also be flipped to point in the direction you want. This can make the presentation visually more accessible.
Texts can also be flipped vertically (turned upside down). This form of flipping is done on the vertical axis (x-axis). You can flip the title of your presentation vertically to draw attention to it, or maybe flip a logo with text for effect.
This article shows you how to achieve these effects with a few clicks, with detailed step-by-step instructions. We’ll walk you through from inserting the image to flipping it confidently in PowerPoint.
How to flip images in PowerPoint
So you’re putting together a PowerPoint slide and insert the image you want, only to notice that the people in it are looking in quite the wrong direction? No problem – it’s time to learn about the different techniques of flipping in PowerPoint.
This section covers how to change the direction and layout of an image to suit your needs. The great thing is that this allows the rest of the slide to remain unchanged; only the image itself is edited. With “horizontal flipping” in PowerPoint, you can do this yourself in just a few steps; we’ll walk you through it.
Step by Step:
Step 1:
Go to the PowerPoint slide in your presentation where you want to insert an image (such as a portrait).
Step 2:
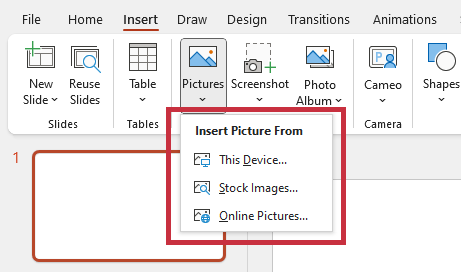
If you haven’t already added the picture you want, go to the “Insert” tab and click on it; the option for “Image” will come up underneath. Click on this, then choose where the picture is to come from – for example “This device” if it’s stored on your computer; just search for it in the folder clipboard, then click on “Open” to insert it into your PowerPoint slide.
Step 3:
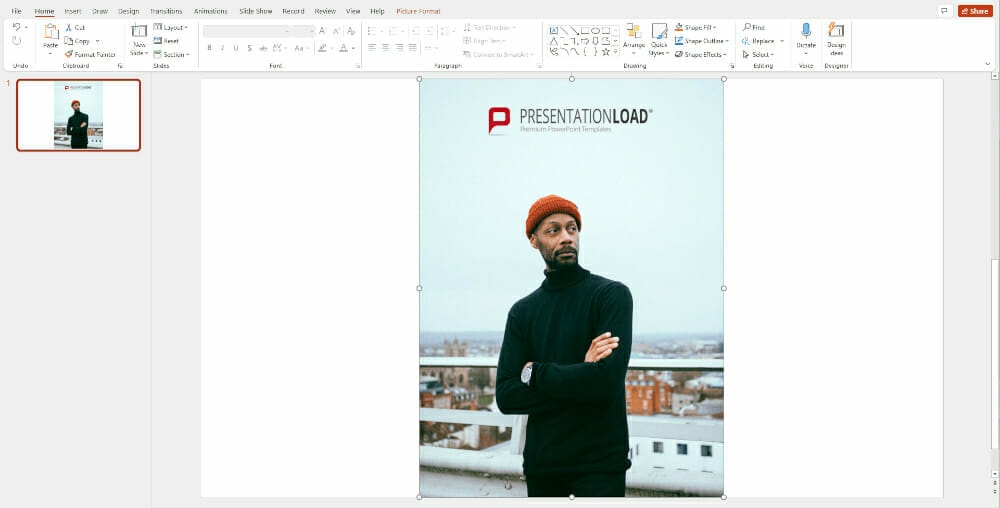
Now you have the picture in the right place, but it’s the wrong way around. Select the image by a simple left click. (This also works for clipart, icons, shapes and other objects.)
Step 4:
The menu bar at the top of the screen will show the “Image Format” tab. Under this, in the “Arrange” section, you’ll find the option “Rotate“. Open the “Rotate” menu and select the appropriate flipping direction – so, for our example “Flip horizontal“. Done!

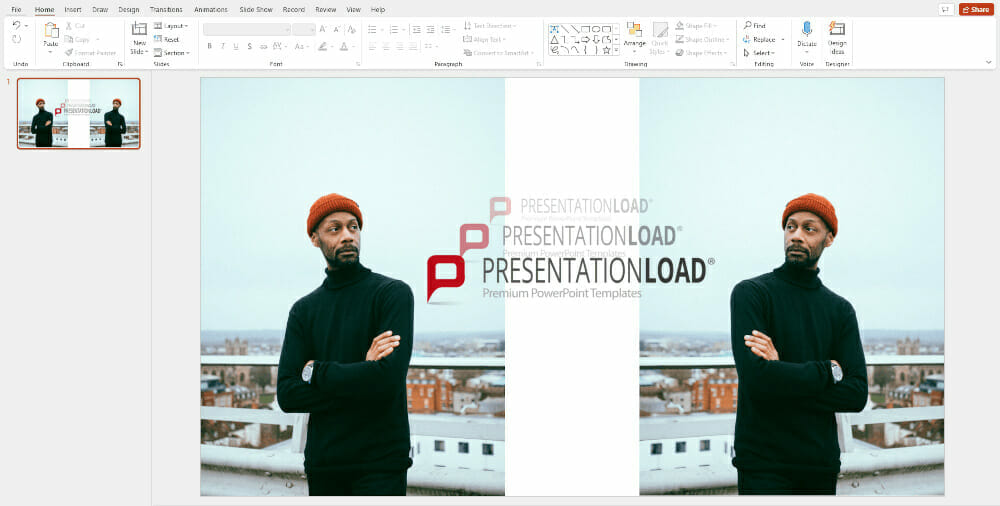
Flip images in PowerPoint manually
You can also flip an image without having to go through the “Image format” menu. First find the image you want to flip, then:
Step 1:
Left-click on the image.
Step 2:
Hover the cursor over the corner of the picture until a rotation point (also called an anchor point) appears.
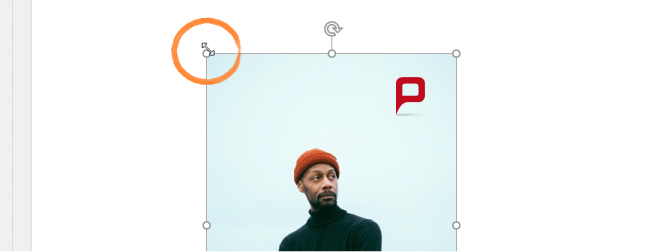
Step 3:
Click on one of the rotation points and hold it by pressing the left side of your touchpad (or the left mouse button). To flip the image, just drag the anchor point over the opposite side of the picture, like this:
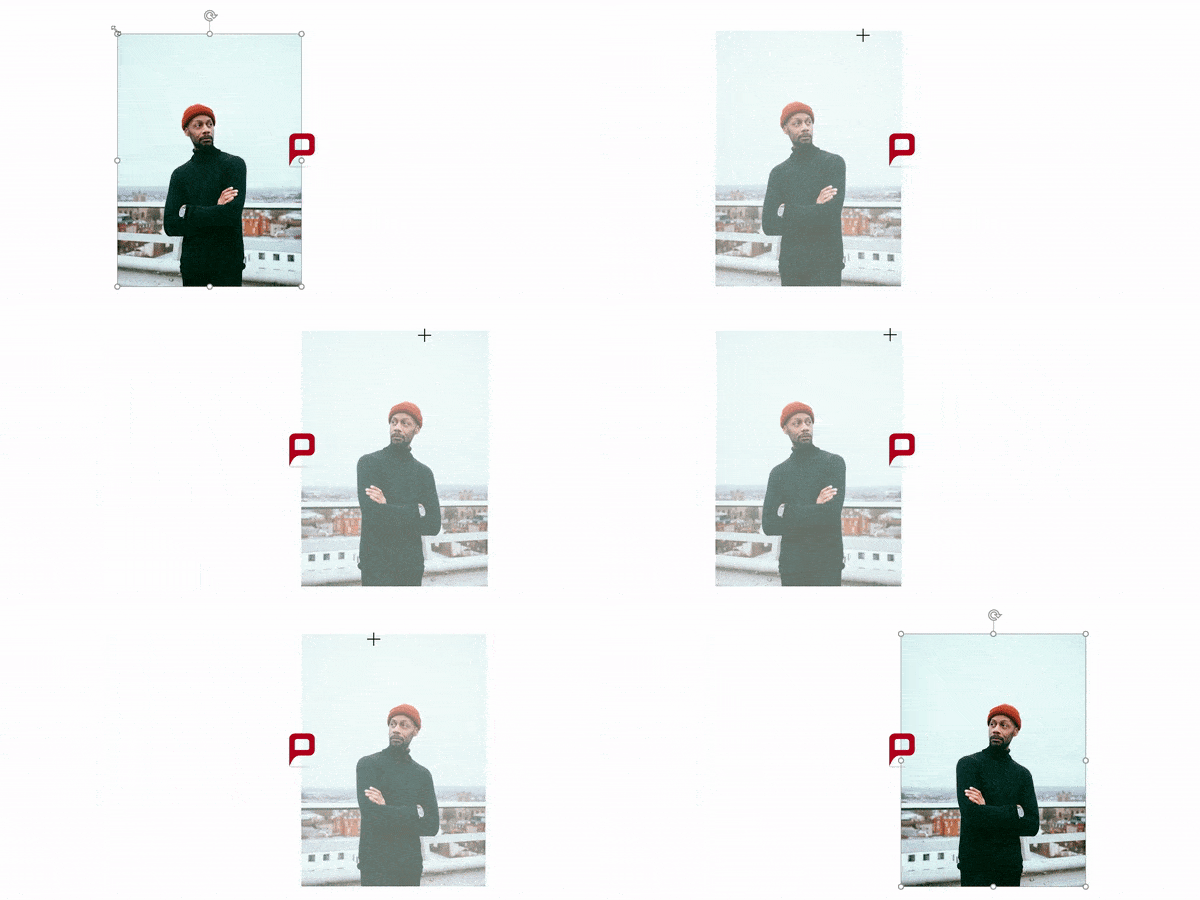
Your image will now appear flipped horizontally. You can now flip any image in PowerPoint to match your slide layout!
Flip symbols, shapes and PowerPoint graphics
Icons and symbols are popular tools for highlighting important findings or connections within a PowerPoint presentation in a clear and memorable way. There is a whole raft of icons out there – from the fields of analysis, technology and electronics, people, communication and many, many more.
Geometric shapes can connect the ideas you are presenting, or separate them from each other; arrow shapes, for example, show direction far more clearly than written-out words. Unfortunately, some PowerPoint symbols are only available in one orientation, so you may need to flip them. Once again, we’ll walk you through it. In the example below, we’ll flip an arrow horizontally, so it points the other way.

Step 1:
Go to the slide where you want to insert the icon. You’ll find the option to insert “Icons” under the “Insert” tab, in the “Illustrations” subcategory.
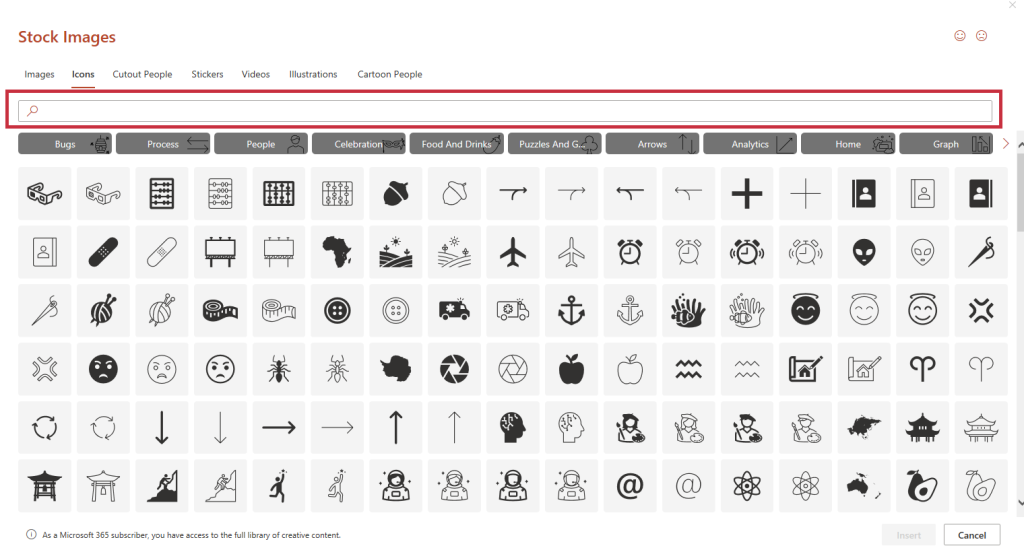
Step 2:
Clicking on “Icons” opens the library. You can use the search bar to search for symbols. In our example, we searched for “arrows“, for example.
Step 3:
When you find the icon you want, just select it and place it on the slide using the Insert button underneath.

Step 4:
The next step is to flip the icon you’ve inserted. To do this, select it and the “Graphic format” tab will appear. You’ll find the “Rotate” option in the “Arrange” subcategory. Just click on the option you want in the selection menu; in this case, “Flip horizontal“. Done!
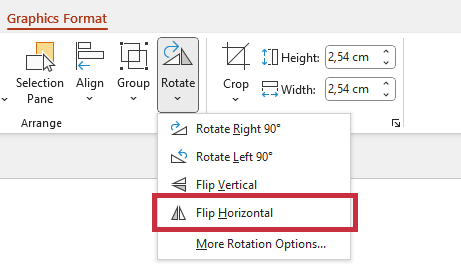
This is what the arrow will look like:

Flip PowerPoint text or turn it upside down
Flipping text in PowerPoint doesn’t work quite like this. The “vertical flip” option just turns the text upside down, but doesn’t flip it – trying to flip it, horizontally, nothing happens. Text can only be flipped as a whole if they are firmly embedded in graphics or shapes:

For stand-alone texts, you can achieve the effect you want by putting it in a text box then rotating on the corresponding X or Y axis. Here’s how:
Flip text in PowerPoint with rotation
Step 1:
First, insert a text box into your slide. To do this, click on “Text box” in the “Insert” tab. Now place the text box by clicking on the slide where you want it, using a left click to anchor a corner, and dragging to expand the box to the size you want. You can now enter the text by clicking in the text box and typing.
Step 2:
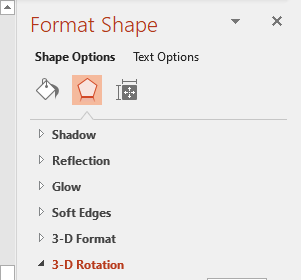
Right-clicking on the text box will open the context menu. Clicking on “Format Shape” will bring up an editing menu at the side of your screen:
Step 3:
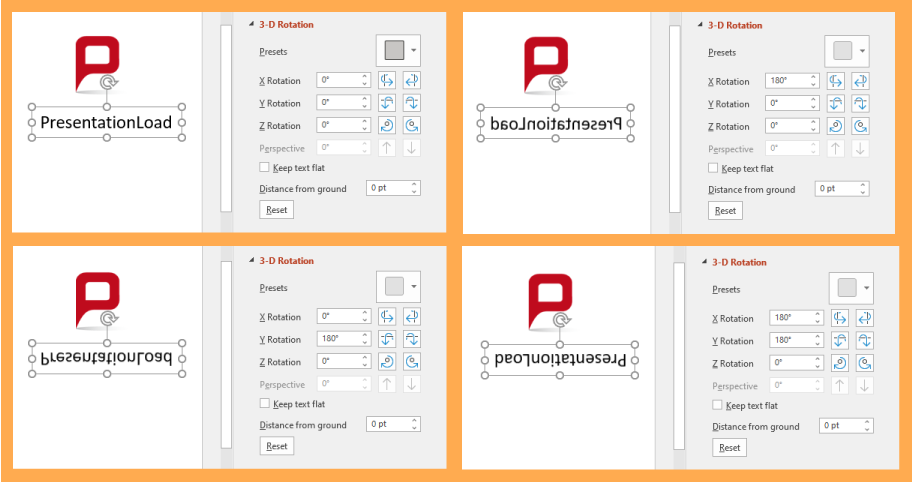
Under the “Effects” icon (a pentagon), open the “3D Rotation” group. To flip horizontally, set the X-axis to 180°. To flip vertically, enter 180 ° at the Y-axis. Using both rotations allows your text to appear both mirrored and upside-down.
Conclusion: Now you can flip images in PowerPoint!
In this article, we’ve walked you through flipping images, shapes, texts and icons. Now you can easily align all your content in any layout in PowerPoint. People in photos won’t be looking out of the slide, and arrows will be pointing in the direction. You now know that you can flip using the “Graphic format“, “Shape format” or “Image format“, and how to do so just by clicking and dragging.
You can even flip text now, using the directions above!
PowerPoint offers you so many amazing ways to make your presentations stand out, and we’re here to help you to discover them.
If you need any clarifications on the above, have more general questions about PowerPoint, or would like some help with a particular presentation, please don’t hesitate to contact me and my team. Get in touch via: [email protected]
You might also be interested in the following article:


