Combining Shapes in PowerPoint
Shapes in PowerPoint can be used to create infographics with relatively little effort or know-how. By combining shapes, you can also create pictograms and icons. Here are a couple of examples.
With a little practice, you can easily combine shapes to create your own custom icons, pictograms and infographics. These provide you with new ways to visually communicate your information. PowerPoint makes this easy, saving you the need for external programs. Here are a few simple methods for creating custom shapes.
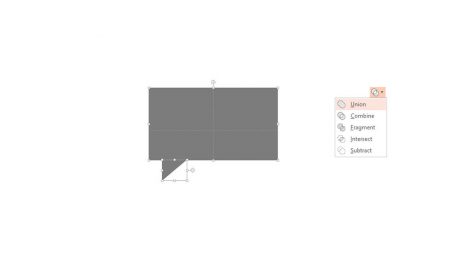
Rectangular Speech Bubble
- Go to Insert > Shapes and insert a rectangle and a triangle.
- Click and drag the rotation handle at the top of the triangle to invert it.
- Drag the triangle under the rectangle so that the shapes fit together.
- Select the two shapes with Ctrl + left-click. Under the Format tab, click Merge Shapes. Select Combine.
Insert a rectangle as well as several circles and ellipses. Arrange the shapes to create the outline of a cloud.

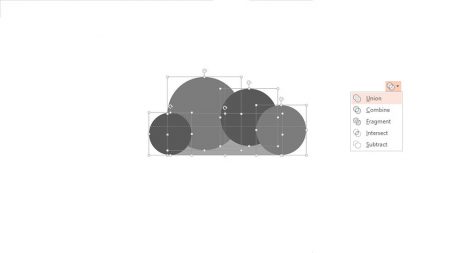
Create a Cloud
- Insert a rectangle as well as several circles and ellipses. Arrange the shapes to create the outline of a cloud.
- Hold down Ctrl and left-click each shape. Under the Format tab, click Merge Shapes. Select Union.
- The shapes are now merged to create a cloud shape.
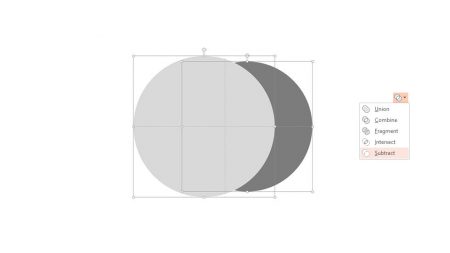
Create a Crescent Moon
- Insert two circles.
- Arrange the circles so that they overlap and form a shape similar to a sideways eight.
- Select the two shapes with Ctrl + left-click. Under the Format tab, click Merge Shapes. Select Subtract.
- The top circle will be “cut out” and a crescent shape will remain. This can be used as an icon or graphic to represent a moon.
Please note that these functions have been available since PowerPoint 2013 – Have fun combining shapes!


