Blur Pictures and Images in PowerPoint: Here’s How!
You might be familiar with this situation: you have carefully designed your slides and selected the appropriate icons, and then all you want to do is change the background image. And suddenly nothing is coherent, and your slides look hopelessly overloaded.
In this article, we’ll introduce you to an image editing effect from PowerPoint that you can use to make your slide content stand out again in no time.
Blurring pictures in PowerPoint – what exactly does this effect do?
The “blur images” function in PowerPoint is all about making images appear a little blurrier. It is a popular design element and can be used for many different things.
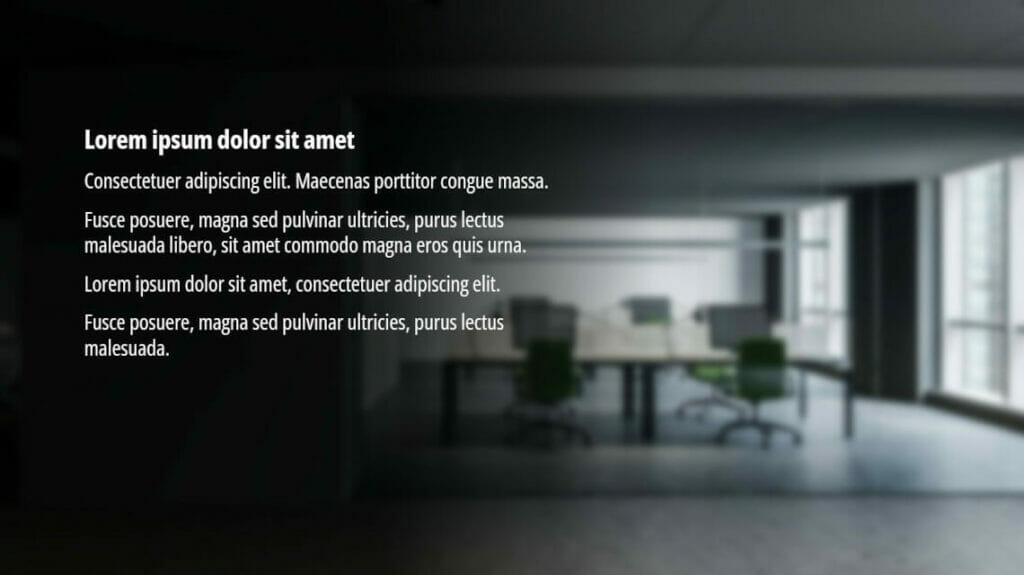
Especially in the background of your slides, soft-focus images with distinctive color palettes stand out, which can create a visually exciting background. For example:

Blurring pictures in PowerPoint: here’s how!
- First, open your PowerPoint presentation and select the image you want to edit.
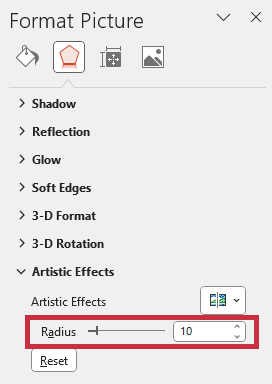
- Then, via “picture format” go to “artistic effects”.

- Now select the “blur” effect from the drop-down menu.
- The “radius” slider lets you choose how much or how little you want to blur your image.


However, with this effect you can not only blur your background images, but you can also edit other design elements. In the next paragraph we will show you what other effects you can achieve with the PowerPoint blur function.
#1: Save blurry pictures
Even though the effect is called “blur”, it can do more than just blur your pictures. If you move the slider to the left instead of to the right, the function becomes a tool that allows you to delineate the colors more clearly in your image. This way, even pictures that used to be blurry become clearer in no time.
#2: Blur as transition
If you want to direct the focus of your audience from one image to another during the presentation, there are options to do this with the blur function as well.
To do this, edit a copy of your original image with the blur tool. Leave both images on your slide and now place the edited image over the original. Then select a transition of your choice under “transitions”.
Now click on your original image and PowerPoint creates a smooth transition to your blurred image. So, for your audience, this looks like the original image is going blurry all of a sudden.
This element moves into the background due to the blur and you can cleverly direct the attention of your viewers to another element on your slide.
You can find more ideas for visually appealing slide transitions in our blog article on “PowerPoint Morph”.
Blurring images – the advantages
As explained earlier, a blurred background is especially useful when you want to highlight certain elements on your slides.
For example, text, but also elaborately designed icons can be emphasized in this way.
For this purpose, choose text and icon colors that harmonize with the colors of your background. For more tips on how to design your background to highlight different design elements, see our blog article on “PowerPoint Backgrounds”.
Are you looking for professionally designed icons? Please have a look at our store. Here we have a large selection of icons for all (business) areas available. For example these:


Conclusion: Blur images for exciting design effects!
Whether it’s for exciting slide transitions or to highlight elements on your slides, the “blur effect” in PowerPoint is versatile. Try our tips and turn your next presentation into an eye-catcher!
Are you looking for visually supportive and professionally designed slide templates? Feel free to look at our store. Here we have numerous slides prepared for you to download on a wide variety of (business) topics. Take a look today! ►To the store
Further articles, that might also interest you:


